Building the Pick'em App with Amplify and Vue
After setting up AWS Amplify, designing the DynamoDB schema and building the AWS Lambda functions acting as the API, it's time to detail the frontend application.
I chose Vue as the JavaScript framework for the application as, combined with Vite, it provides an excellent development environment.
Main Configuration
The main.js file is where the Amplify configuration is loaded from the auto-generated JSON file, styles are hooked up, and Vue is mounted to a div with the id app. All this is fairly bog-standard at this point.
import { Amplify } from 'aws-amplify';
import { createApp } from 'vue';
import amplifyConfig from './amplifyconfiguration.json';
import '@aws-amplify/ui-vue/styles.css';
import './style.css';
import App from './App.vue';

Amplify.configure(amplifyConfig);

const app = createApp(App);
app.mount('#app');
Authentication
I find authentication a tedious chore. Superficially it seems simple, but a complete workflow involving password resets, storing tokens, handling expiration and so on is much more involved. Amplify takes care of the heavy lifting. For Vue, it ships with a drop-in Authenticator component that takes care of the full workflow. It contains customisable aspects for both its presentation and functionality. This includes setting all the authentication JWTs in local storage, so that API calls you wish to make later on will be made with the appropriate HTTP headers. Nice!
Vue has the concept of slots - placeholders allocated within a component by its designer for customisation. I utilise two of these slots on the Amplify Authenticator component - one for a header, and another for the content that's displayed upon successful authentication. Slots can have names (such as header) or be specified as the default. The component can also pass properties through to your template. Authenticator passes a signOut callback that can be hooked up to a button for signing the user out.
<script setup>
import { Authenticator } from '@aws-amplify/ui-vue';
</script>
<template>
<authenticator :hide-sign-up="true">
<template v-slot:header>
<header>
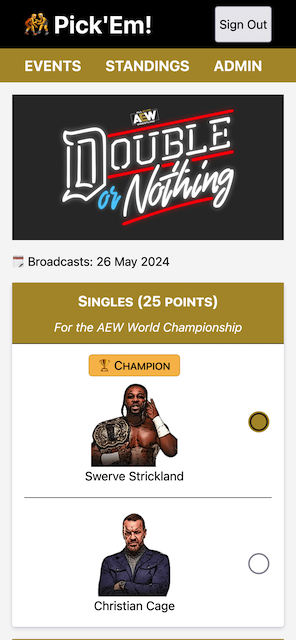
<h1>🤼 Pick'Em!</h1>
</header>
</template>
<template v-slot="{ signOut }">
<header>
<h1>🤼 Pick'Em!</h1>
<button @click="signOut">Sign Out</button>
</header>
<Nav></Nav>
<router-view></router-view>
</template>
</authenticator>
</template>Overall, authentication is a nice experience in Amplify. Just drop it in and customise as appropriate. One aspect not provided out of the box, unfortunately, is functionality to identify which Cognito groups a user belongs to. I use this information to identify whether a user has administrator permissions, and can therefore add events, matches and submit results. This information can be retrieved with a manual API call to Cognito, which is called when the Nav component is mounted:
<script setup>
import { fetchAuthSession } from 'aws-amplify/auth';
import { onMounted, ref } from 'vue';

const isAdmin = ref(false);

onMounted(async () => {
  try {
    const { idToken } = (await fetchAuthSession()).tokens ?? {};
    if (idToken.payload["cognito:groups"].includes('admins')) {
      isAdmin.value = true;
    }
  } catch (err) {
    console.log(err);
  }
});
</script>

<template>
  <nav>
    <router-link to="/">Events</router-link>
    <router-link to="/standings">Standings</router-link>
    <router-link to="/admin" v-if="isAdmin">Admin</router-link>
  </nav>
</template>
Let's dive a little into the routing.
Routing
Within the Nav component, there are some router-links (the admin link is conditionally rendered based on whether the user is an administrator). These components are supplied by vue-router, the official single-page-app routing solution for Vue applications.
Alongside the Nav component, the router-view component is rendered upon sign-in. This is the designated area where application 'pages' will be rendered.
Routing is specified in a plain old JavaScript file that is included as part of the main application configuration. Vue-router expects routes to be expressed in an array of objects that map a path to a component. For paths with a segment that can be paramaterized, precede with a :.
Here's the routing configuration for the user-facing application components:
import { createRouter, createWebHashHistory} from 'vue-router';
// ... and all the components

const routes = [
  { path: '/', component: Events },
  { path: '/predict/:event', component: Prediction },
  { path: '/results/:event', component: Results },
  { path: '/standings', component: Standings },
  { path: '/user/:name', component: User },
];

const router = createRouter({
  history: createWebHashHistory(),
  routes
});

export default router;
Returning to main.js, the routing can be included simply by importing the above file and adding app.use(router);.
Within a component, there will be times where you will need to retrieve the paramterized path segment. I need this when a user clicks through to an event, so I know which event to load! The routing params can be obtained within the setup script by calling useRoute. In the routing script above, notice that I'd paramterized the path :event. There is a field on route.params called event:
<script setup>
import { useRoute } from 'vue-router';

const route = useRoute();

route.params.event;
</script>
Pulling path params from the routing mechanism leads us nicely on to making API calls.
API Calls
As mentioned earlier, because Amplify handles authentication for you, making API calls with a JWT is entirely transparent to you as the coder.
Amplify exports HTTP-verb functions from the api package:
import { get, post } from 'aws-amplify/api';These functions can be used to call your API gateway, in the typical Promise-like style:
const result = get({ apiName: 'pickemapigateway', path: '/app' });
const response = await result.response;
const body = await response.body.json();
A lot of the component pages that I use follow a similar pattern of fetching some data on load. I settled on implementing this in a consistent manner through the component's setup script.
<script setup>
import { get } from 'aws-amplify/api';
import { ref, watch } from 'vue';
import { useRoute } from 'vue-router';

const loading = ref(true);
const data = ref(null);
const route = useRoute();

async function fetchData() {
  try {
    const result = get({ apiName: 'pickemapigateway', path: '<path>' });
    const response = await result.response;
    const body = await response.body.json();

    data.value = { ... };
    loading.value = false;
  } catch (e) {
    console.log(e);
  }
}

fetchData();
watch(route, fetchData);
</script>
I like to add a watch to the route object, so that if a user navigates to a different page within the app and back, the fetchData call will run again. This prevents stale data. I tend to store loading and returned data as refs within Vue, meaning that they can be used within the rendering logic.
Forms
The most complex piece of UI within the application is the <form>-based functionality. Forms are used extensively, for submitting predictions, to creating matches, events and submitting results on the admin side! I found simple form-based state handling in Vue really simple to work with.
Similarly to loading data via an API call, I arrived at a pattern for handling form logic. Within the setup script, I define a submitting field and an empty object (boring named form) for holding form state. I also define a submit function which handles whatever submission logic needs to be performed, wrapped by setting the submitting value to true and then false. In order to unwrap the proxied data held within the ref, vue provides toRaw function - which will return a plain old JavaScript object, ideal for POSTing.
<script setup>
import { ref, toRef } from 'vue';

const submitting = ref(false);
const form = ref({});

async function submit() {
  submitting.value = true;
  const formData = toRaw(form.value);
  // Do Something
  submitting.value = false;
}
</script>
On a <form> component itself, I discovered that I needed to suppress the default browser behaviour for form submission. I also created a custom component which accepted the submitting value as a parameter, to encapsulate the logic around the form's submit button:
<form id="prediction" @submit.prevent="submit">
  ...stuff
  <SubmitButton :submitting="submitting" />
</form>
The submit button is disabled while submitting is true. In case this isn't an immediate action, the text also changes to give user feedback. It achieves this by watching the submitting property for a change - if it changes in such a way that it goes from true to false, it will display a 'Submitted' message after a brief timeout. As this setTimeout is invoked in the lambda of a watch, it won't invoke until absolutely necessary which keeps the UI snappy.
<script setup>
import { ref, watch } from 'vue';

const props = defineProps({
  'submitting': Boolean
});

const buttonText = ref('Submit');
const submitted = ref(false);

watch(
  () => props.submitting,
  (submitting) => {
    submitted.value = !submitting;
    buttonText.value = submitting ? 'Submitting...' : 'Submit';
    if (!submitting) {
      setTimeout(() => {
        submitted.value = false;
      }, 3000);
    }
  }
);
</script>

<template>
  <div>
    <input type="submit" :value="buttonText" :disabled="submitting" />
    <span v-if="submitted">✔️ Submitted!</span>
  </div>
</template>
Coming back to how form state is bound within that form ref, it's just a case of binding to a property of that object using the v-model property on a form <input>, and Vue keeps it in sync for you!
<input type="hidden" id="name" v-model="form.name" />In Conclusion
That's it! This is the Pick'em app basically complete! Aside from quality-of-life enhancements, the functionality that I need is basically there. I'm quite happy with how the application developed from concept to implementation. Amplify made things quite simple for me in terms of developing the skeleton infrastructure, providing the deployment mechanisms and integrations with Cognito, API Gateway and DynamoDB.
Or Is It?
As I was writing this series of posts, AWS announced Amplify Gen2. Although there's no upgrade guide at present, I'll keep up with developments in this space.
There's one outstanding question - should I roll this out to the masses? Doing so would involve some significant infrastructure changes. I'd need to scale the application to handle many leagues rather than one (so that groups of friends can create their own leagues), alongside the supporting functionality (invite codes, etc).